Yay! Here is our first ever tutorial. We have chosen to feature one of our multi-colour stencils. With Christmas just around the corner, the poinsettia seemed like a perfect choice.
Not familiar with our multi-colour stencils? If you have ever gazed longingly at hand painted cakes but were too nervous to tackle your perfectly covered cake with the brush of a novice – our multi-colour stencils are perfect. For those of you that have an inner artist itching to express their talent, these stencils will provide a perfect template to get your creative juices flowing.
This tutorial will get you started without needing any advanced cake decorating skills. We chose to use petal dust as it is a wonderful medium that works well on stencils and is only limited by your imagination. For the bracts I would recommend a couple of colours to add a little more interest and depth – rather than laying down a single flat colour. Yes they do look like petals but for those appreciating botanical correctness we will call them bracts.
After watching our overview video above I decided on a much better hand model. Special thanks to my beautiful daughter Madalynn for her assistance.
We chose to illustrate our poinsettia with quite a bit of contrast, but you could go for a more subtle approach. For the sake of this tutorial Madalynn worked on a plaque but the top (or side) of a Christmas cake would be beautiful.
Let’s get started!
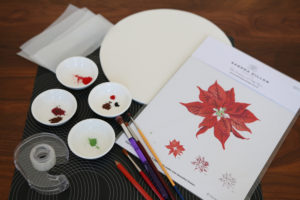
You will need:
- Our poinsettia multi-colour stencil (gently washed in warm soapy water and dried thoroughly)
- Petal dusts (in colours of your choosing)
- Brushes (used only for cake decorating)
- Pencil (non-toxic, HB)
- Some strips of baking paper
- Clean cotton wool tips (devoid of ear wax please)
- Rose spirit or alcohol – we used vodka (some for the artwork and a little for the artist)
- A fondant covered cake or a plaque
- Tape (optional)
Step 1
Select Stencil 2 and position it where you want your flower to sit. Stencil 2 is used as it indicates the full size of the poinsettia. Make sure the stencil text is right reading (i.e. facing up).
Step 2
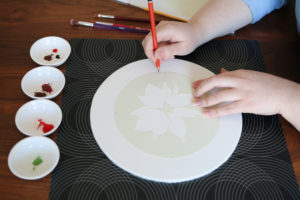
Lightly mark each of the five notches with a sharp HB or harder pencil. Keep your pencil upright to ensure accuracy. When you have completed your stencil work, remove marks with alcohol on a cotton bud. Alternatively you could scribe or place pins at the inner apex of each notch.
Step 3
Remove Stencil 2 and replace with Stencil 1 making certain the text is right reading and ALL five notches match your markings. You can secure your stencil with a little tape if you don’t feel confident to hold it in place.
Step 4
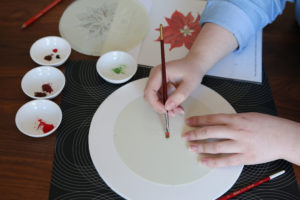
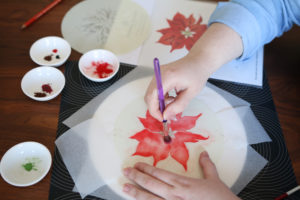
Brush on your petal dust. The aim is to build colour rather than dumping a brush full of petal dust that will just sit there – waiting to give you problems! Try using a stipple action with your brush. Keep your stencil flat and make certain your brush and dust do not bleed under the stencil. Lift your stencil and place aside. Do not remove the stencil by dragging it off your cake as it WILL smudge.
Step 5
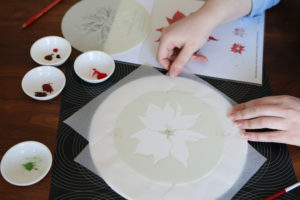
Place Stencil 2 making certain the text is right reading and ALL five notches match your markings. You can secure your stencil with a little tape and use the baking strips again.
We tend to be liberal when applying our dusts so a little protection from well placed baking paper strips helps. Slide these under the stencil to protect your plaque or cake, making sure they do not cover the design.
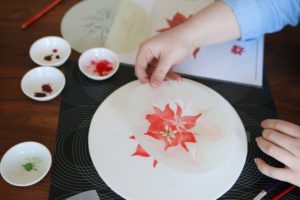
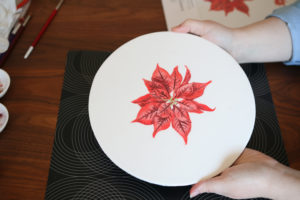
Stencil 2 illustrates the colour bracts. Try dragging your brush across the stencil edge into the bract area for crisp definition. Remember to build layers of colour. We found using two reds added interest. More importantly, a better effect is achieved by using the dust in a somewhat random fashion. No need to go for an even layer of colour with our poinsettia – patchy colour works best on this occasion! When you are finished having fun with Stencil 2 lift it carefully and place aside.
Step 6
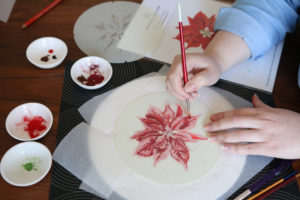
Place Stencil 3 making certain the text is right reading and ALL five notches match your markings. You can secure your stencil with a little tape and use the baking strips again. Brush on a darker colour that will give your bracts shadow, depth and texture. Carefully lift Stencil 3 and place aside.
Step 7
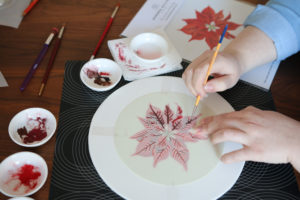
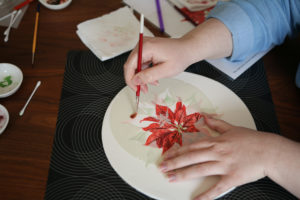
Place Stencil 4 making certain the text is right reading and ALL five notches match your markings. You can secure your stencil with a little tape and use the baking strips again. This stencil layer will create veins. We chose to use a little vodka mixed with some petal dust on a small fine brush. Use the stencil as a guide for your brush. This gives a lovely fine detail. It is important to wipe off any excess alcohol so it doesn’t flood the underside of the stencil. You may need to apply more than one coat to reach your desired intensity. Alternatively brush on petal dust as you did for the other layers. When complete, carefully lift Stencil 4 and be prepared to revel in your sheer talent!
If you feel any of your layers need more colour, feel free to carefully replace the relevant stencil and add a bit more. Make sure you have carefully wiped down the stencil back with a dry cloth before placement to avoid colour transfer.
For something extra…
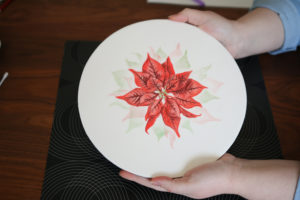
If you’re feeling creative, go ahead and use Stencil 2 (again wiping the back with a dry cloth) to softly add greenery to the flower. Use any part of Stencil 2 that fits your design. No need to use the notches for this stage as it is based on random placement. You can use the same petal dust colours with a very light hand.
View our full range of multi-colour stencils HERE!
Stay tuned for future tutorials showing the endless possibilities with other mediums and techniques.


Awesome tutorial Samdra and Maddy. Very clear on how to use this fab stencil. Thank you xx
Thank you so much Ange!
I have used the peony stencil and love it. I bought this one for this years Christmas cakes. Thank you for the tutorial.
That’s wonderful to hear Maureen! You probably don’t need one but we will have a tutorial on the peony. We would love you to share your peony work on our Facebook page!
Hi Sandra great tutorial
Thanks Kim!